Ravelly Followers

Reminder

If you are a "non-responder or OpenID-er" which to me means I have no way of responding to a comment that you've left, please leave a way for me to get in touch with you, especially if you're participating in a blog give-away or if you are asking for information or links.
By leaving your email within your comment, I can find you. I realize that this is sometimes a scary thing to do with scams and all but if you disguise the email as say.....
me at yahoo dot com
this is the perfect way to hide from the unwanted eye. So please help me out if you are one of the non-responders.
Thank you, in advance.....Ravelly Rhonda!!
Showing posts with label Stash. Show all posts

Jan 1, 2019

Stringing in the New Year

I finally got some time to myself & decided to sew.
I'm sure you remember this beginning from the other day.
I decided to use gray on the one side & included a strip of black to accent those colors.

On the other side I'm using a pale green, another black strip & a large black floral.
Here's what the blocks look when turned with the florals in the center.
Here's what it looks like wth the black in the center.
Stay tuned for more later.
What are you doing this week? I'd love to hear from you.


Dec 29, 2018

Stringing With Some Friends

Gene & a couple of other blogging friends prodding me into the string fever so I got into the sewing room, pulled out some tissue like paper for foundation, decided on a center & got that glued in place. Like Gene, I'm a bit OCD, which means for me, I can't just go with totally pulling random strips from a bag. I had to at least have a center in one fabric all the way through.

Dec 8, 2018

More Tangent

I made another soaring eagle using brown tones.

On to the next one. I love making the beaks & eyes. The little details are so important.
Hummmmm. It needs something more.
I like this much better. I'll need to add a tiny white dot in the eye later!!


Oct 22, 2018

Change of Plans - Finally & A Moose to Boot

I've been saving the fabric for the largest pumpkin for quite some time & I'm happy with the choice.

I like this arrangement & will get it quilted soon for Thanksgiving anyway....laugh out loud! 
As you all know me so well, you know that my attention span is very short. So when I found a photo of a moose, I just had to put my spin on it.

After tracing the moose design onto fabric adhesive then pressing that onto black fabric, it was time to cut out parts of the center.
Here's a view from the front side.
Back to cutting with tiny scissors, of course.
Finally all done with the cutting. Now on to auditioning background.
#1 - what are your thoughts?
#2 - Any thoughts?
#3 - Help me out friends!!! 
Or should I find another fabric background?


Oct 9, 2018

Change of Plans - Part 2


The second pumpkin is almost ready to take its place. I'm running low on orange fabric. You know what that means...wink!


Oct 2, 2018

Why Not.....Well, Change of Plans

Ok, so after thinking and then sleeping on it, here's what I decided.....
Here's the Jack O' Lantern I chose but.......well you'll see.

Most of you know my methods of using Heat N' Bond or Steam A Seam to trace off the design pieces then fuse them onto the chosen fabrics so I won't go into that. But I will show pics.

I use the original design to see if I like the placement of the fabrics.

So far so good.

Here I've placed all the parts onto the black background. Now here's where I've changed my mind.....again!!!! I decided to make pumpkins instead of the Jacks. The grandbabies liked that idea more, so I'm going with what they suggested. I'll do a bit of handwork for the tendrils and the veins in the leaves later. 
What are your thoughts? I'd love to hear from you.  BTW, Mr. Cowboy is out in the hay fields doing more cutting. I thought this part was over. Thank goodness he has help and I'm not involved this time. I'm keeping my fingers crossed on this one. I've missed getting in the sewing room, fondling the fabric and making a good mess!!
And another thing. Since Blogger is sort of messed up with the comment thingy, I have started responding to comments on the comment pop-up. So if you needed an answer from me, I try to answer there.
 

Sep 30, 2018

Maybe...I'm Thinking, Why Not?!

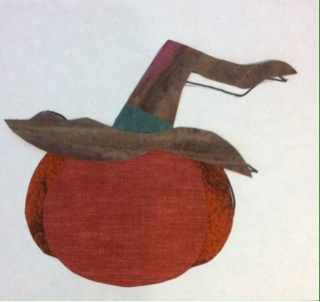
Here's the fabrics from my stash that I'm considering using for a Jack-O'Lantern table runner. If you'd like to join me, I'll be posting each design weekly until Halloween.

Apr 30, 2018

Mini Tutorial

Several of my blogger friends have expressed an interest as to how I go about making my minis. So I've decided to attempt to explain in a sort of step by step process.
BTW, this post is loaded with photos.
First, I like to either look thru photos that I've taken in the past or look at some of the clipart photos on the subject I'm interested in from the Internet.
Today I decided to do a sunrise or sunset scene. So I'll need to choose from several photos.
This photo has subtle colors and appears a bit foggy.
This photo could be a sunset on the plains.
I really like this photo and will probably to it another time.
This one I thought reminded me of one that one of my blogging friends mentioned that she was interested in making.
All these photos are from the Internet and they all are fascinating to me because of all the possibilities such as.....I'm seeing a mixture of fabrics I'd want to use. I love mixing batiks, solids, prints, florals, etc. 
I'll probably save the ones I don't choose at this time.
I like I'll work with the first photo. 
Now that I've chosen a photo to work with, I'll need to print out a copy.


With the chosen photo traced on the back, I'm thinking that I want to enlarge it a bit so off to the new printer (LOL) to get that done.  Note: The traced photo is in reverse. 

Now I've enlarged it 125% which means it's about 7 1/2" by 9" at this point.

Next I chose some fabrics to use. Sorry about the photo. The one in the very middle is a McKenna Ryan gradient fabric (love it) and the others are an assortment of batiks and some that read as solids.....which are gray, pale yellows and greens, a dark brown and I might choose other fabrics later.  I looked carefully at the photo I chose to get color ideas but it's easy to change or decide on another color scheme.
You see, it's not so hard to do this. I know you can too!!
Now, it's time to trace the design onto the Heat-n-Bond. This is where things get tricky because the parts need to be traced in pieces, such as the tree bark then the tree foliage, next.......  I'll demo to show how that's done.

I'm showing the chosen photo again, hopefully in a better light to finalize my color choices and to be able to compare the photo to me project as I go along.

I've numbered the sections that I'll be tracing just to keep up with every part.

I've chosen the McKenna Ryan piece as my foundation and background. Usually I'd us a muslin as a foundation then all my fabric choices on top but the Ryan piece has just the right colors that I'm looking for even though they don't quite match the actual photo. Remember, it's your project, so if you want to change colors or add something......that's the fun of it all.

Here I've traced off the different parts onto the Heat-n-Bond. Notice that the parts are separate and a bit larger that the actual pieces. This is for adjustments because more is better than not enough. So always give yourself more traced area because you can cut something down easily.

In this photo I wanted to show the difference in the right side and wrong side of the fabric, not because you don't know the difference but because sometimes the wrong side of the fabric is a better fit for what you are looking for than the right side.  Someone once told me, "Remember, we've paid for both sides."
All parts are not pressed to the wrong side of the fabrics I've chosen.

Now I've cut all my pieces out and laid them on the McKenna piece so that you can better see them.

Here you can see the non-stick pressing sheet that I use so that the Heat-n-Bond doesn't gum up my ironing board.

I'm now building from the ground up.

I really like the sun fabric I chose.
Here you see the whole thing before I press everything down.

Also, I like to compare the original to what I've done.


Here are all three. I'll probably do a bit of crayon work around the sun....YES, I said crayons. They are great to add some detail and depth. Just press using a sheet of paper or muslin between the project and your iron.
I hope this helps those of you who are interested in this type of thing. Please leave a comment if you care to. I love hearing from you.


;-}

Don't count the days, make the days count!

Hands2Help

H2H 2013 logo

LinkWithin

Related Posts with Thumbnails

Hop