Ravelly Followers

Reminder

If you are a "non-responder or OpenID-er" which to me means I have no way of responding to a comment that you've left, please leave a way for me to get in touch with you, especially if you're participating in a blog give-away or if you are asking for information or links.
By leaving your email within your comment, I can find you. I realize that this is sometimes a scary thing to do with scams and all but if you disguise the email as say.....
me at yahoo dot com
this is the perfect way to hide from the unwanted eye. So please help me out if you are one of the non-responders.
Thank you, in advance.....Ravelly Rhonda!!
Showing posts with label Borders. Show all posts

Aug 31, 2017

Prayers and Another Border

I have been praying for my fellow Texan down south. I live more toward central Texas so we've only gotten around 10" of rain over the course of several days. 
We've spoken to several relatives who are weathering the rainstorm. They are in good spirits & dry for the time being.
The photo isn't great but I've placed a border on this quilt top. It's one of my donation quilts.
I decided to embroider these praying hands on a t-towel for our church's fellowship hall. It really feels good to be getting in some sort of sewing!

Nov 23, 2015

Just Before Thanksgiving

Hi everyone! 
This is a busy time around my house.....getting ready for Thanksgiving......all that cooking.....you know how it is.
I did manage to get some sewing in. I sewed two borders on this beauty. I love it. The final measurement is 70 inches square.
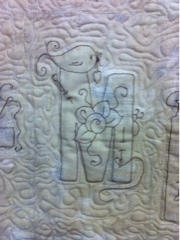
Then, last week I quilted my hand embroidered ABC quilt at a great place I mentions some posts back, "Seldom Seen Quilting Studio" in Waxahachie, Texas. Diana, the owner, is always on hand to help and give suggestions.

Here's a close up. Now to get the binding on......maybe after Thanksgiving........giggles!!!


Aug 7, 2015

Piano Keys and Done

I finally got around to bordering my string quilt top. Piano keys look cool but are time consuming. Let me just say, "whew!"
Annie (no blog) and I visited the quilting place I mentioned a few blogs ago..."seldom seen".....& I was able to quilt in a day my green fractured diamond quilt. I am very pleased with my meandering. I'm so happy we found that place!!


Jul 31, 2015

Cabin Fever Part 2

As you can see, I've added side borders & to that, pine-like trees....don't know what I'll add next but this looks promising . It measures 44"w/31"l so far. Any thoughts on what to do next??

Aug 29, 2012

Going Buggy Block #8 & Ayden's Quilts Wrap-up

We are almost done. Just two more blocks and your quilt can be put together or whatever your plans are for the blocks. Here's the LINK for the next block.  These types are projects are so much fun and can be done while riding in a car or sitting in your easy chair. Remember to LINK up and enjoy the process.

I finished the borders for Ayden's two quilts and even managed to hand embroider the strings on the balloons then straight stitched over it on the machine using same colored thread.
Measurement for this quilt 42 1/2 by 60 1/2 inches


Measurement for this quilt 39 by 42 inches

Aug 26, 2012

A is for Rabbit

Not really but I'll explain.
Ayden, (that's her with mud all over her body)

GoGo's little princess will turn 4 in a couple of months so I've decided to get a head start on her presents from me (GoGo).
She loves pink, loves pink. Loves the color pink.

So I've been digging through my stash for pink and I ran across several pieces, thank goodness. I took a page from Beth's project "Dump and Sew" and just grabbed up whatever pink color I had and sewed it to the next pink color for the background of Ayden's quilt. I must say, it turned out great!  Then I took a page from Paula's award winning project "All She Wants To Do Is Dance" (BTW, make sure you pop over and scan down to see the quilt. It's precious) and decided to add a rabbit to the mix, dragging the letter "A" around.
I'll need to stitch in the ties to the balloons to the leg of the "A" and add the PINK roses border you see in the photo. I'm shooting for a 36 to 40 inch square quilt. Perfect for rolling around on the floor on....LOL

Aug 20, 2012

Another Finish

Sorry about the fuzzyedges of the photo.
I've just finished sewing these two borders on this quilt which measures 64 inches square. I posted about this quilt a couple of months ago. I'd been looking at the design for years and finally found time to make it. There were loads of HST in the quilt but I love the results. All the fabrics came from my stash.

Apr 5, 2012

QOV

I'm working on a Quilts of Valor  that Marjorie is hosting, and am making progress. There's a "GO" challenge but I'm just doing a quilt.
 Found this quick design "Crazy Nine Patch" .... love it because it's a quick, strip piecing type project.
My PFAFF was smoking through the 12 blocks.


 Each block finished at 19 inches..... I know that's a weird measurement but remember who you are dealing with...... LOL
Block sewn together.... looking pretty good to me

For some reason I decided to do piano keys... OMG, it's taking longer to make those than the whole quilt.... LOL
Please note: I used only fabrics from my stash!!

Mar 7, 2012

No Border Yet

I've finished sewing the blocks together but haven't had time to even decide on a border. The blocks started with a base yellow fabric of 12 1/2 inches. The quilt top now measures 72 inches square. I just love the two designs that make up this quilt and I used lots of scraps ...... about 5 yards worth.
This quilt was a very quick one to complete and will go into my stash of quilts to be used one of these days.
 

Look at this wonderful quilt top a friend make using a 1/2 inch black strip between those beautiful batiks.
 Then there's this neat Disappearing Nine Patch quilt blocks. Can you believe that these started out as nine patches???

Finally, these blocks were from the last quilt my friend Jerri worked on before her illness took her. The woman could really put together the fabrics.

Feb 16, 2012

Flowers for Texas

 I could hardly sleep last night thinking about what I wanted to do next with the Texas block. I knew I wanted some sort of flowery fabric but what?????  Looking in my vast stash of scraps, I ran across the above fabric. Great! 
Large flowers - check
The color range needed - check
Plenty of Steam-a-seam - check
Let's do this!
I added a 3 inch border of the gray fabric and then fussy cut the flowers and leaves needed. I love it! Now to stitch it all down...... maybe tomorrow.  


32 inches square, so far.

Jan 26, 2012

Scrap Borders Almost Done

I'm just about done..... only the bottom to sew on but company is on the way so I've got to cook instead of sew.

Jun 24, 2011

Sew-In Results - "When Nature Calls" - Finished

 All done and I'm so happy!
I went with an old dead tree with long branches and a surprise at the end.
Measures roughly 56" by 68"
BTW, all from my stash!!!
Note the tissue!!!
Turning the corner on the first side adds a lot of interest, along with all the gnarly branches.
The wood-zie looking fabric did the trick.  
Don't be afraid to buy that unusual looking fabric.
I decided not to go all the way round the quilt with the tree branches.  I've used this method in several quilts and like the effect.  What do you think??
Several bloggers have asked me to do patterns for this quilt, so I'll be developing those in the next few weeks to share with everyone.
Now, I'll have to get this little one quilted but that's for in the far, far future.  

Jun 22, 2011

When Nature Calls Borders - Sneak Peak

I could not help myself with this sneak peak of mitered borders.  It's been forever since I've tried mitering but I was very happy with the way it turned out.....  Now, onto that other fabric I chose..... stay tuned.

Jun 21, 2011

Border Possibles

These are the fabrics I'm going with, I think, for the borders around the "When Nature Calls" quilt.
I really appreciate all the wonderful suggestions that everyone gleefully offered.  We have had a great laugh about the outhouses and our memories of the past.
I'm going with the toilet paper suggestion and a couple of others I'll save as a surprise.

Jun 18, 2011

Friday Night Sew-In / When Nature Calls #5

Here's what I've gotten done so far with my "When Nature Calls"
I added more trees that bleed into the filler blocks above and below the Outhouses.  I like the look of them.  So far the quilt measures 46" by 58".  I now have to decide on a border or borders..... any suggestions???

Apr 21, 2011

Another Use .....

 See the paisley fabric in the block above. It's from a border fabric I bought a few years ago.  You know, one of those moments of impulsive buying. You get the picture.  Well, after much thought as to what to do with it once I bought 6 yards ........ I know, I know ...... crazy!
I decided to use it in one of our "wacky" challenges, which turned out beautifully.
I love the look of this quilt because of the effect of the dark and light sides of the blocks.  The border fabric was placed in the center diagonally across. Hope that wasn't too confusing.

 Now, I was left with the rest of the border fabric.  BTW, I hand cut (no rotary involved) the border sections apart.
I used an ugly not so pretty fabric as a base to flip and sew. Note that I also placed the border fabric off center in these blocks.  I also sewed light fabrics on opposite ends to get a secondary design.

I need to make several more blocks before I decide how this will be sewn together.
This is a FQ that I bought recently. Not enough to make a quilt but maybe an apron.
So the next time you're in your favorite quilt shop, don't pass up that border fabric.

Aug 7, 2010

This or That


So, I finally found time to sew on the 1 1/2 inch black border.  Now it's onto the final border. I'm auditioning 2 fabrics so far. What do you think?  This or that or maybe something else.

Jul 30, 2010

First Border Plus New Project

The first border is from the same 2 1/2" squares that I swapped with my wacky buddies. I'm thinking of placing a 1 1/2" black border next, followed by a floral border which I have not chosen yet.  Maybe I need  to visit my local quilt store.......hehehehehehehe

As most of you know, a few months ago, the Wacky 6Pack lost one of its members to cancer.  We often think about Jerri and her great antics.  The woman was truly something else.  At our retreats we drink to her and laugh at all those great jokes she told.
Jerri and I bought our Janome 11000s at the same time from the same store.....actually Jerri talked me into buying the machine...(that's my story and I'm sticking to it)....
Anyway, I've had the wonderful machine for a little over 2 years.  I was exclusively using it for embroidery until my wacky girlfriend Annie (no blog....can you believe that) told me that I really needed to start sewing on it.......I did as she demanded.......LOL....and yes, it sews like a dream but embroidery is a passion of mine, it's in my blood.  I've become an embroidery addict and frequent MANY embroidery sites....some of you know how that is........
Where was I.......oh yea, back to this wonderful machine....Annie mentioned that I should be able to stitch out photos with it.......that was months ago......okay, so I had to allow the thought to stew a bit.  I decided that my first project would be dedicated to my friend, Jerri.  I found a picture, fiddled with the shading using Picasa 3 (don't ask, it's a photo storage thingy from the net), scanned the image into my Janome design thingy, added stitches, blah, blah, blah, blah........and stitched it out.  See the steps below and if you really want details of each step....let me know, cause that will have to stew in my little, pea brain for awhile.


The final measurement is 5 inches by 7 inches.

Feb 22, 2010

Freedom - The End

YeeeeeHaw!  I'm all done and lovin this little quilt!  It measures at 35 1/2" by 56" and as you know I've named it "Freedom" ............ This quilt started about a month ago....... it was something in my head and I had to get it out......LOL ...... as some of you noticed, one of my borders is the "fractured diamond" blocks.......see tutorial at this link.......... I wanted this quilt to look different from the "standard" quilt shape, so I decided to make what I call "rays of moonlight" curved top. This was accomplished by strip piecing all the scraps left from the log cabin and fractured diamond.   
The word "Freedom" is from the font - Papyrus.  It is one of my favorites.

;-}

Don't count the days, make the days count!

Hands2Help

H2H 2013 logo

LinkWithin

Related Posts with Thumbnails

Hop