Ravelly Followers

Reminder

If you are a "non-responder or OpenID-er" which to me means I have no way of responding to a comment that you've left, please leave a way for me to get in touch with you, especially if you're participating in a blog give-away or if you are asking for information or links.
By leaving your email within your comment, I can find you. I realize that this is sometimes a scary thing to do with scams and all but if you disguise the email as say.....
me at yahoo dot com
this is the perfect way to hide from the unwanted eye. So please help me out if you are one of the non-responders.
Thank you, in advance.....Ravelly Rhonda!!
Showing posts with label Instructions. Show all posts

Feb 4, 2012

Nine Patch Alternative

 Nine patches before squaring up. I went with the darker fabrics on the corners. This is yet another way to 
get rid of use more of your stash. I'm using some of those 1500 two and a half inch squares that my "wacky" girlfriends and I shared a few years ago.
 All squared up to 6 1/2 inches.
 Now cut nine patch down and across... this is known as the first step in the disappearing nine patch.

Mix them all up.
Now the fun begins.
I'll probably be sewing while watching the Super Bowl tomorrow.

Oct 26, 2011

Seal

I've had this idea in my head for a couple of months.  Had to do something about it.... LOL.... As you all know, I'm from Texas and as we all do, I love my state, the people, nature, the weather and even the little scary critters who often invade my yard, the back forty, come into my garage, fly by my head, have the nerve to even...... sorry..... where was I?
Oh yeah...... anyway, I found this clipart photo, thought it had potential, studied it, thought about fabrics to use and then went for it.
I went with soft colors for the most part... olive greens, butter yellow, rust, browns, with pops of color... black and white. All fabrics came from my stash. I'm so proud of myself.

 The background fabric is gray which I just love. The photo does not do it justice.

So far this block measures 20 inches square but I will probably trim it down to 18 1/2 inches.
This is what I have so far. I've got to add the acorns to the oak area next.
I plan to do some hand stitching to vein the leaves and stitch around for the circle effect. So stay tuned.

Aug 29, 2011

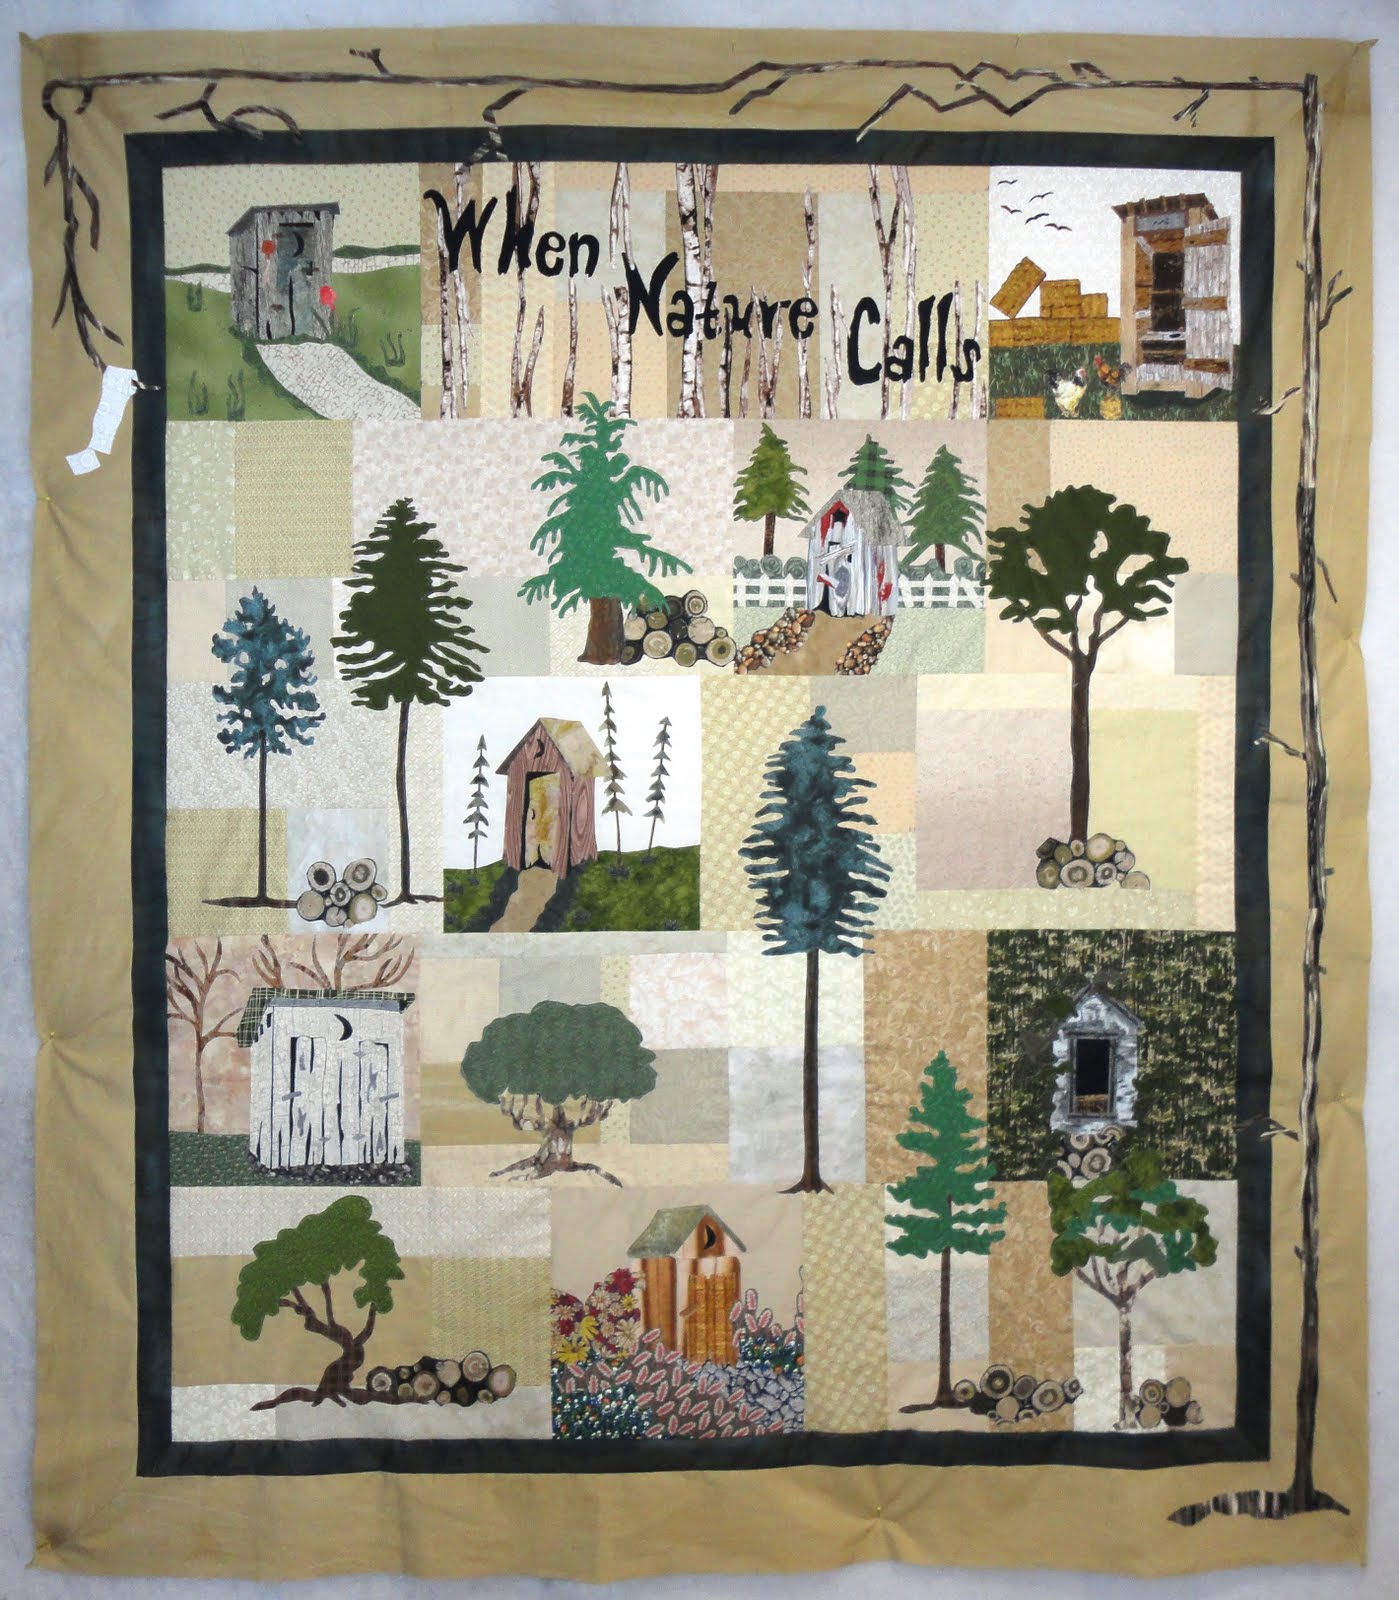
When Nature Calls - BOM - Block #2


Well, Block #2 is here and I must say this one is probably my favorite. I love the fence in each of the blocks.
Remember that these blocks were designed so that you can add scenery or it can stand alone with little details.
I was shopping for just looking around at my LQS and found a couple of excellent landscape type fabrics that I just had to have. I can't wait to put them in the next WNC block.  Be on the lookout for fabrics that can be used several different ways. A fat quarter is a great way to add to your stash.

Jul 27, 2011

When Nature Calls BOM - Block #1


Notice that the 3 block above look slightly different from the other.  I just wanted to show how little can be added or how much.
It's finally here .... a little early!  Block #1 from "When Nature Calls" (WNC)
I couldn't wait another minute to share with everyone.
You can find the pattern on my sidebar.  Make sure you copy & past the photo of WNC to add to your sidebar as a reminder each month.
Each block was produced in no certain order and placed in the quilt as I liked them.  That said, as you develop your blocks, here's a chance to create your own masterpiece. Each block is already reversed so that when you're ready to arrange the pieces they are turned the same direction as in the photo.  Hope that made sense.
This BOM is designed to get rid of some of those use some of your scraps and bits of fabric. Add a touch of your imagination and you've got a winner!
Now for a bit of fun
Leave a comment about this first block in order to get your name in the "hat" for a chance at five 9 1/2 inch squares of my favorite landscape type fabrics which would fix into any nature block. (no photo - my surprise)
If you are a FOLLOWER or become a follower, you get two chances.

Jun 3, 2010

Just In Time for the 4th - Part 3


With this next eagle, notice that I have traced the parts that I will be using on a large sheet of freezer paper.  This makes it easy to turn onto the back side when using the light box.
Also, note that I have added something.  It is perfectly fine to change or alter your design.  Here, I've added the other leg and talons to the eagle. By using a lighter shade of yellow, you get a sense of depth to the piece.
I am using some of the same fabrics that I used when making the first eagle but I am also, adding a couple of fabrics as well.  This lends individuality and continuity.
I am showing a couple of different positions and shapes of the eagle just so that you can see where to place the fabrics to give the best showing and depths (foreground and background).  You may want to make only one eagle for this project.  Don't get overwhelmed.
So, have fun. Play around with the colors your have chosen and don't be afraid to change or add things to suit your needs.
My fascination with eagles, bald eagles in particular, comes from my early science experiences categorizing the animal kingdom (mammals, birds, reptiles, amphibians, fish, etc.).  Later, when I became a science/art teacher, my students developed an interest.  These tutorials of the eagle can be applied to any animal.
G'G' was kind enough to send me a link to a live-cam of a bald eagle's nest.  Follow this LINK to Channel Islands live webcam to get a better look at the wonder of the bald eagle.

In the next segment, we'll talk about auditioning background fabrics, placement and methods of stitching.  
Remember, this wall hanging will be finished and ready to hang by the 4th of July even if you can only work on your piece 30 minutes at a time.

May 26, 2007

Videos

Finally, I was able to place a video of something (the Hummer) on my blog. One of my "Wacky" friends wanted to know how I did it. Well let me tell you all before I forget. LOL 1. If you don't have a free accound with www.photobucket.com get on. 2. Now you're ready to begin. Photobucket gives you step by step instruction. So if I can do it....you can do it. 3. Follow those instructions and with in moments for you DSL luckies or 30 to 50 minutes for us unlucky gals.....your video will be loaded onto photobucket. 4. You will then copy the HTML....go back to your blog to the customizer/dashboard....in item.... paste to HTML and save. 5. View blog &........TaDa! There it is. I hope this helps and if it doesn't.......I'm a Wacky, what did you expect? LOL

;-}

Don't count the days, make the days count!

Hands2Help

H2H 2013 logo

LinkWithin

Related Posts with Thumbnails

Hop