Ravelly Followers

Reminder

If you are a "non-responder or OpenID-er" which to me means I have no way of responding to a comment that you've left, please leave a way for me to get in touch with you, especially if you're participating in a blog give-away or if you are asking for information or links.
By leaving your email within your comment, I can find you. I realize that this is sometimes a scary thing to do with scams and all but if you disguise the email as say.....
me at yahoo dot com
this is the perfect way to hide from the unwanted eye. So please help me out if you are one of the non-responders.
Thank you, in advance.....Ravelly Rhonda!!
Showing posts with label Hawk. Show all posts

Oct 3, 2017

Celebration Part 5

Onward!
Someone asked about the design I used in a previous post. I'm freely sharing it today. It's mostly half-square triangles with a few, what I call, blank squares added. You can use any size HST.

This Fractured Star design is perfect for the eagle I have in mind. The design for the Fractured Star, which I've used many times, you can probably find if you do a Search of tutorials on my Sidebar.
Just wait until you see the eagle I'll be using. It's perfect!!!!
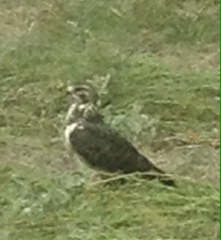
Here's sort of hawk in the hay field waiting for the balers to scare up a mouse, rabbit or snake. No need to soar overhead & wear out the old wings....laugh out loud! 
WINNERS!!!
I'm still waiting to hear from Needled Mom who won the last fat quarter. Her favorite color at the moment is yellow. Mr. Cowboy was anxious to pick the latest name from the old cowboy hat because he needed to get back to the hay fields to move those bales into storage. So the winner for a fat quarter this post is Gene! Congrats to Gene who has requested blue
Leave a comment to participate in the fat quarter give away. I think I have a couple more post before the 1600 mark.


Feb 28, 2017

A Fun Saturday

Last Saturday I was invited to teach a mini class for some wonderful & funny ladies!!
You may remember this Texas with bluebonnet a & eagle I did months ago. I did another Texas & added a star & lettering to the latest one. I also decided to use shades of brown for the eagle.
The following are just a few minis that the ladies did:
I great time was had by all!!


Feb 17, 2016

Mini Wednesday

And...... it's back to birds. 
I've been bouncing back and forth from birds to doors. That's how wacky I am.
I've titled this mini "Bird's Eye View"
It measures 9" by 10"


It is amazing to see the eye come alive. All these tiny pieces are necessary to make that happen. I should have lain a quarter beside the piece to show scale but forgot. I used my favorite tiny scissors to make all the cuts. Without them it would be impossible.

Now for the feathering and beak to form the face area. Choosing just the right fabric is sometimes time consuming but that's part of the fun.

It's hard to tell from this photo but the beak which is a dark gray, comes from my stash. I found it at the very bottom of a bin of scraps. It pays to dig deep!

Bottom beak also a slightly less darker gray. Various taupes and tans add to the coloring of the feathers.

A dark brown for the brow gives the eye an intense look.
That, "I am smiling" attitude most predatory birds have.

Now add background fabric.


Jan 6, 2016

Mini Wednesday

Greetings Mini Wednesday followers. I can't believe it's 2016 already. I've been busy sewing up a storm but didn't post until now.
"I Am Smiling" is my new mini.
Several of you wanted to know where and how I get my ideas so I decided to talk about that process in this post. As most of you know I'm a country gal although I don't like many of the country critters (that's for another post or you could get more acquainted by reading previous posts labeled "critters"). We grew up on a working farm with milk cows, horses, mules, etc. Also there were coyotes, wolves, skunks, beavers, hawks, snakes...... sorry, back to the subject. Anyway, I have plenty to draw from. I was an art teacher for many years and sometimes miss that part of my life. I like to surf the clipart pages  for inspiration, as well. My love for fabric lead me to attempt to "paint with fabric." so to speak.
Here's how a project happens from start to finish.

 I find a picture that I like, trace off the parts that I want to use (not all parts of the original are necessary to make a good fabric outcome), then number the chosen parts.
Next, choose some fabrics for your projects. You are not locked into the fabrics you choose. I often change my mind in the middle of the whole thing.

Now, the really fun part!!! As you use your fabrics and fabric adhesive to develop your piece, take photos of each step. It's fun to see how things develop and you can also catch mistakes or not so good fabric choices.

This is the beak. I like the way it turned out.

The shadow of the eyes and beak...none of which are in the proper position yet.

Added eyes.....oh yeah, loving the look.


These photos are where I'm developing the feathers around the beak. I'm using shades of gray. You can't have enough gray in your stash as far as I'm concerned.


More shades of gray and a tiny black dash to define the brow.

And here's the results for "I Am Smiling," It measures 8" by 11" finished and bound. Love it and I hope my explanations aren't too confusing.


;-}

Don't count the days, make the days count!

Hands2Help

H2H 2013 logo

LinkWithin

Related Posts with Thumbnails

Hop