Ravelly Followers

Reminder

If you are a "non-responder or OpenID-er" which to me means I have no way of responding to a comment that you've left, please leave a way for me to get in touch with you, especially if you're participating in a blog give-away or if you are asking for information or links.
By leaving your email within your comment, I can find you. I realize that this is sometimes a scary thing to do with scams and all but if you disguise the email as say.....
me at yahoo dot com
this is the perfect way to hide from the unwanted eye. So please help me out if you are one of the non-responders.
Thank you, in advance.....Ravelly Rhonda!!
Showing posts with label Stabilizer. Show all posts

Oct 17, 2017

And I'm Back To The Minis

So, I've had this guy in mind since before I lost my mojo. Then when I got my mojo back, I was off on another tangent but I had already pulled several fabrics that could possibly fit.
Using my favorite fabric adhesive and the chosen fabrics, I set to work pressing, cutting and sorting each piece.
I use a non-stick pressing sheet to arrange things.
The rabbit has come together very well.
Here is where I went off the deep end. I have some great brick fabric that I wanted to use and a neat sky piece.
I placed the rabbit atop the background to see if I like what was going on. So far so good.
I took great pains to make the pocket watch. I used a fine tip permanent marker. I'll add the chain to the watch when I quilt the piece.
As I stood back things looks really good but it needed something else. The sky area was missing a little something.
I've added a tree trunk and might add a few leaves but not sure at this point.
It measures 12 1/2 by 17 1/4 inches.


Dec 12, 2012

In These Shoes


"In These Shoes"
is what I've named my new project. I don't know what I'll do with these 
except all a few more styles.
This year I've really tried to "not" purchase fabric and only use what I have.
That, surprisingly, has worked well. Yea, me!

On another note, I can't believe it's 12.12.12
I hadn't thought about events like this lately, other than, the first president I remember when I was little or where I was during 9-11 or the year I retired (LOL) and then there was Y2K. 
This is awesome to live through.
Take care everyone!!

Oct 6, 2012

Quilt Jack-o-lantern Project


I used the backside of the background fabric, an orange batik that I've been hoarding for years for the face, a solid  darker orange for accent shading, a gray mottled fabric for the hat (BTW, I collect gray fabrics of all shades. They are really great as accents most of the time.), Moda black for shading, a very small piece of white-ish sliver fabric for the buckle and a dark green for the grass.
Of course, I used my favorite adhesive - Steam-a-seam! Maybe in the next couple of days I'll get everything stitched down and machine quilted. BTW, this little block is about 9 1/2 inches square.

Sep 30, 2012

Tea Time Teapot Block 3

I decided to to post a day early for the Teapot BOM.
Two views of the October Teapot.
The link for the design is on my Sidebar.
Enjoy!

Sep 1, 2012

Tea Time Teapots - BOM - Block#2

The next block is a cute little teapot that reminds me of the winters with my grandma.
Enjoy this one.


Remember there's a LINK or two on this post and one on my Sidebar.
And I love it when you leave a comment.
 It's time for another Give Away. Here's how it works. If you have my Tea Time button on your blog's sidebar and mention that in your comment, it's one chance. If you happen to be a "FOLLOWER" and mention that in the same comment, as well, that two chances.
Remember, this is an honor system give away, so please play fair!!
What's up for grabs, you ask?????

Well, let's see......

This soft back book is about 45 pages of wonderful and quick projects such as making quick pillows, bags, and table toppers.
Also, included in this give-away are twelve 12 inch squares of some of my favorite fabrics (color green, BTW). Oh, they are so tempting. Take a look...
Just imagine what you could do with those babies!!! 

OMG! I just noticed that this is slightly over my 1000th post. Can you believe it because I sure can't!!!!!
How in the world did I do it....LOL


Good luck, in advance, to those who are participating!!

Jul 27, 2012

More From the Horn of Plenty Book

 Bananas
 Green Apples - the photo is not this block's true colors....don't know what happened but it was probably the camera's fault......just sayin'
Strawberries
I just can't seem to stop myself even though I know I should be doing house work or canning or something else.... SIGH!

Jul 13, 2012

Coming In August - Tea Time

No, it's never too hot for this project. Living in Texas in the summertime it's usually too hot to even think about drinking anything hot but this project does not require drinking.
I've been working on a new BOM which I've named "Tea Time" and of course it's all about teapots. This twelve month project is a great way to  dive into all those wonderful scraps you have laying around.  If you love tea or you're a collector of teapots and tea kettles, you might like to make a quilt to hang in your sewing room or kitchen area. 
Stay tuned in because August is when it begins. Start pulling some fabrics and think about background fabrics and threads.........I need to stop.......LOL......join in the fun......
See you in August!!!

Mar 24, 2012

So, I'm Thinking......

I've slept on it and come up with this.
 Twenty-five 4 1/2 inch squares of tone-on-tone. 
 Four varied shades of blue prints - I used my grandmother's fan template to cut the shapes.
This view is just to see if I like what's going on.  I think I do so I'll be working on sewing everything down.

Mar 12, 2012

Step 3

Photo

Shhhhhhh......I can't believe it but I found some time to work on my woodsy project.

  • This is just an audition step. 
  • By cutting and laying out the various fabrics pieces, I can pick and chose what works and what doesn't. I've already pressed the adhesive and cut the pieces..... it's a very small price to lose the fabric I don't choose.
  • I'm thinking at this point that I may need to use a different background... a little darker but still mottled.
  • I've used the reverse side of a black fabric to shadow the hollows n the trees and I really love that effect. Batiks really work great in this type of project.
  • I found some subtle greens for brush in my stash but as I said, I need a different background......
  • Once I've finalized everything, I'll stitch everything down and add the thin limbs and branches shown in the foreground on the photo.

Stay tuned.

Mar 11, 2012

Step 2


Using a light box or light source, I've starting tracing the reverse side of the photo. I know my images are faint but that's alright with me. I used something called Dry Mounting Tissue. A box of it was given to me by a friend years ago and at the time I had no idea what to do with it. But it has really come in handy as an almost transparent product.
On each tissue I traced one component of the photo which will be matched with a fabric later. I used a Sharpie Permanent marker for tracing..... it's the only thing that won't wipe off.
Each traced component will now be traced onto the Steam-a-seam and then pressed to the back of the chosen fabric when I find the time to get to it.  
I'm afraid that life is about to get in the way for a few days so hang in there and stay tuned.

Mar 10, 2012

Fabrics Chosen

In a recent POST, I talked about a new applique project that I'm thinking about from a photo I took.
I don't have a plan when I start these kinds of things. I just know that I love what I see and go from there.

First, I made a reverse copy of the photo... this is for tracing onto the steam-a-seam (my favorite adhesive and no, I'm "not" doing needle turn applique.... LOL). Next, I started pulling fabrics that appealed to me and fabrics that seemed to match the colors in the photo (all from my stash that seems to grow instead of decrease). Black and dark brown are not pictured with the fabrics but I will add those later for shading. I don't know if you can see the background fabric I chose between the two photos at the top but it's a marble grayish batik that is perfect...... love it!!!
That's what I've done so far. The next step will be taking apart the areas I want to work on such as tree trunks, branches and brush.
Stay tuned.

Dec 3, 2011

When Nature Calls - Block #5

 Background type fabric (example)


Block #5 is up and ready. I am really excited about this particular block because of the background fabric choices. This block is a great one for that unusual woodsy, forest type fabric because this particular outhouse is deep in the great outdoors, so to speak.
I have provided a sample above along with a fabric that compliments it for greenery.
A PDF has been provided on my sidebar plus a LINK right here because sometimes I forget. Enjoy!

Nov 6, 2011

Mockingbird

 This is the next block that will go along with my Texas seal.  It's my version of a Mockingbird.  I made four log cabins using 1 1/2" strips and 2 1/2" strips. This gives the log cabins that rounded look you see in the photo.  All fabrics are from my stash which I'm determined to use as much as possible.

Oct 26, 2011

Seal

I've had this idea in my head for a couple of months.  Had to do something about it.... LOL.... As you all know, I'm from Texas and as we all do, I love my state, the people, nature, the weather and even the little scary critters who often invade my yard, the back forty, come into my garage, fly by my head, have the nerve to even...... sorry..... where was I?
Oh yeah...... anyway, I found this clipart photo, thought it had potential, studied it, thought about fabrics to use and then went for it.
I went with soft colors for the most part... olive greens, butter yellow, rust, browns, with pops of color... black and white. All fabrics came from my stash. I'm so proud of myself.

 The background fabric is gray which I just love. The photo does not do it justice.

So far this block measures 20 inches square but I will probably trim it down to 18 1/2 inches.
This is what I have so far. I've got to add the acorns to the oak area next.
I plan to do some hand stitching to vein the leaves and stitch around for the circle effect. So stay tuned.

Oct 18, 2011

Memorix


Two new additions but still no real direction as to what's going to happen next.
I decided to have the owl facing inward ... don't know why but I like it better that way.  I still have to stitch everything down, that's for a retreat.
Hopefully they won't wind up in my UFO box..... LOL

Oct 7, 2011

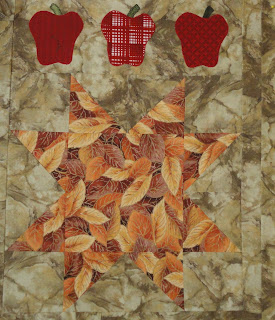
Autumn

I've often talked about my "wacky" girlfriends who come up with loads of crazy ideas usually involving something painful, well not painful but some loony sewing project.  The following is one of the first weird things we participated in years ago before I knew what I was really getting into.
But first, these are the "sisters" I'm so fond of.  As you can see, they have influenced me and not in a good way.... LOL  One of our beloved sisters passed away over a year ago (Jerri, seated in floral) but she is always with us in spirit and always manages to make us laugh to this day.  Her favorite line.... "Not it!" when we hatched with some outrageous idea.
 This project started as a wild idea at a retreat years ago. I think one of the girls had had a couple of too strong coffees or something. Anyway, we all wound up at a local quilt shop with goals of looking for a fabric for each of us.  Something unusual that could be use as a background. I chose the  marble-y brownish woodsy sort.... boy was that a mouth full.
 Once each of us chose and purchased our background fabrics, we brainstormed about what to do next. Notice we tend to plan as we go.... LOL
My theme was "Autumn" and each person was to make one or two block with that theme in mind.
Some of the ladies really got creative and ambitious.

One group member decided to make hands and hearts to go in each quilt top.
Note the spider in this block..... very funny, someone.... very funny!
I was really happy with the overall quilt and how well the background fabric worked out. At the time this was made, I was not very good at making sure the quilt squared up but it was definitely a learning experience and one of "MANY" that I've ventured into with my "wacky" girlfriends.
Final measurement 44" X 62"

;-}

Don't count the days, make the days count!

Hands2Help

H2H 2013 logo

LinkWithin

Related Posts with Thumbnails

Hop