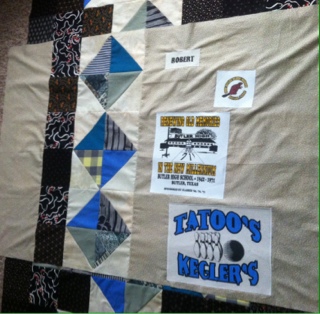
I've added a row at the top and bottom of the body of the quilt to lend some length and that's that!!!
Now to get to work on the backing which sometimes takes longer to do than the top.....sigh
I'm using a couple of the t-shirts provided and the rest of the HSTs.
Finally done with the backing. Yeah!!!
Now I'll need to quilt everything and present it to her.........I'm going to buckle down and get this done. You've heard it here!!
This is my own design that I sketched out a few years ago. Feel free to use it.
My friend Guilitta asked about the design I used for the star. I hope I explained well enough about the construction but might have fallen short.
So I'll try again to explain. The block size can be "your own choice" that's the beauty of this design. If you're making a mini quilt to a king-sized quilt. I used 6 1/2 inch blocks for the memory quilt because I was working with fabric from her husband's shirts.
There are several ways to make HSTs and it's easy to find out on youTube. I hope I've explained a bit better.


5 comments:
Adding the extra row on the top and bottom works! It changes the overall pattern but not in such a way that it looks weird....it simply elongates the star.
It looks as good on the back as it does on the front. Have fun quilting it.
I really like the way you added length to the quilt. The design still moves nicely. Brava!
Thank you very much Rhonda,
I understand your explanation very well. The drawing makes it clear. The extension of the quilt is very successful.
Thank you for providing your pattern.
Greeting Guilitta
Post a Comment